Transit tips to help make your bus and LRT riding experience quicker, easier and more enjoyable.


Riding the LRT

Riding the LRT

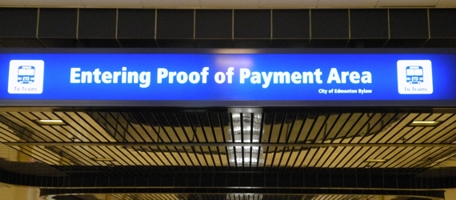
Signs throughout the LRT system alert passengers to Proof of Payment Areas.

payment sign

A blue sign indicating a Proof of Payment area

You must be in possession of a valid fare product within a proof of payment area. Valid forms of payment include:

  • An Arc card or an Arc ticket.
    • Arc cards can be purchased online, at Arc vending machines, the Arc call centre (1-888-302-0001), or in-person at a participating retail outlet or service centre.
    • Arc tickets can be purchased at all Arc vending machines or at in-person service centres.
    • A full list of retail stores that sell Arc can be found online.
  • A physical or digital credit or debit card, tapped when you enter the proof of payment area.
    • You will not receive a paper proof of payment, but your account transaction history will show when you last tapped your physical or digital card.
    • Transit Peace Officers are able to scan your payment card or your digital wallet to see when it was last tapped, in order to confirm a fare was paid.
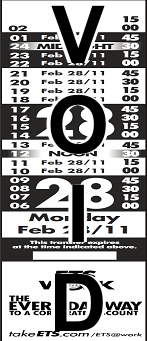
  • Valid ETS paper transfers
    transfer-void

Random checks for proof of payment will be made, so be sure to have yours handy. There's a $150 fine for fare evasion.

To validate your Arc card/ticket:

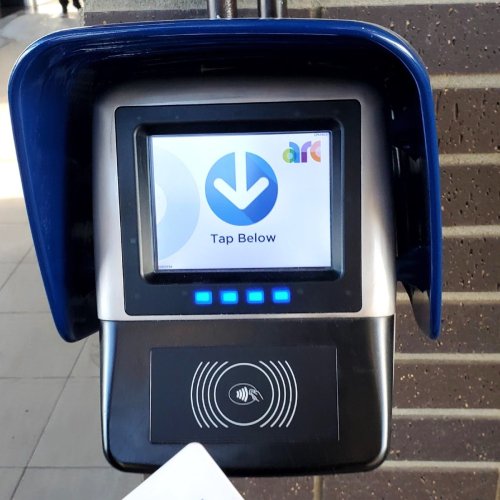
Tap the Arc card/ticket on the Arc validator before entering the proof of payment areas

validator machine


Waiting for the LRT

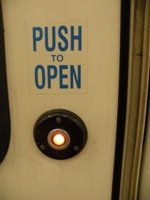
For your safety, please wait for the LRT by standing behind the safety strip, at least two metres from the edge of the platform. Listen for train announcements, including the destination and track number. When your train approaches, wait until it has come to a full stop before you step to the edge of the platform. You can open the train doors by pushing a lit button found beside the door. Allow other passengers to exit the train before you board.

pushbutton

How LRT Doors Works
  1. LRT trains can not depart from a station if any of the doors are open.
  2. You will hear a warning sound as the doors are about to close and the train is about to depart.
  3. All of the doors on the LRT have sensors that detect when someone or something is blocking the door. These sensors hold the door open when there is a blockage. If the door is jammed while closing, the doors will reopen and then try to close again automatically.
  4. The LRT operator controls when the doors can be opened by the passenger push button, but the closing of the doors is controlled automatically. Once the door sensors are clear, the doors will close 4 seconds later.
  5. All LRT cars have an accessible door. This door is located in one of the centre positions on the LRT car and has a blue stripe along the top and a wheelchair symbol on the door.
  6. Each accessible door has a ramp that lowers automatically when the accessible button is pressed to minimize the gap between the platform and the LRT car. This ramp has sensors to ensure it stops at the proper level.
  7. LRT doors have red emergency handles or red push buttons above each door. Should something get stuck in the doors the emergency handle or button can be used to contact the operator.
  8. All LRT cars have a yellow emergency strip above the windows. When pressed, it puts passengers in the car in direct contact with the operator. There is also a red emergency button near the accessible doors for those who cannot reach the yellow strip.
  9. Do not hold the LRT train doors open except in case of emergency. Holding a door open on the LRT train may make a train run behind schedule. The next train can be delayed as well. Be considerate of your fellow passengers and don't block the doors.
On the LRT

Find a seat, or, if the train is crowded, hold on to one of the poles. LRT vehicles accelerate rapidly and quietly, and can knock you off balance. If you're standing in front of the doors, stay back as they open. You'll hear a bell just before the train starts moving. This bell also warns passengers on the platform to stand clear of the edge.

Portable listening devices (cell phones and tablets) are allowed on the LRT at the operator’s discretion. If your music disturbs others, you may be asked to turn it down or off.

An LRT station map above each train door will tell you which station you are approaching. A recording will announce each station as the LRT approaches. As with boarding, you must open the train doors by pressing an adjacent lit button. As you exit, look for signs above the platform for direction. Remember to hold on to your LRT proof of payment if you're planning to use the bus, as it can be used to transfer to a bus.

Getting Help

Our Transit Watch program is one way riders can report safety concerns, like harassment, disorder or suspicious behaviour, directly to ETS staff in our Control Centre.

Call or text Transit Watch at 780-442-4900, anytime.

For emergencies, immediately call 9-1-1.

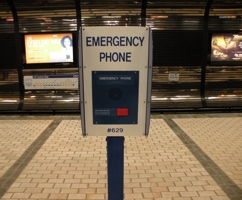
Blue emergency help phones are in all LRT stations and allow riders to connect with our Control Centre directly if support is needed.

emergency

Transit Peace Officers patrol the stations and travel the system, and are there for your protection and security. Please feel free to ask for help if you encounter a problem.

To learn more about our safety procedures please visit Safety and Security.

Riding the Bus

Finding your Bus

ETS offers two types of bus information: scheduled information and real-time information. Here’s how they compare:

table
 Real-time InformationScheduled Information
Available for all bus routes, except for the Stony Plain Road shuttle. Available for all bus routes and the Capital/Metro LRT.
Continually updated so you know exactly when your bus is departing.Outlines scheduled bus times and only change when the schedule changes.
Provides real-time departure times for all stops.Provides scheduled departure times only for stops known as timing points, which are stops used to ensure that ETS buses remain on schedule by preventing buses from departing too early and allowing buses to ‘catch up’ if running late. All other stops are estimated times.
Waiting for your Bus

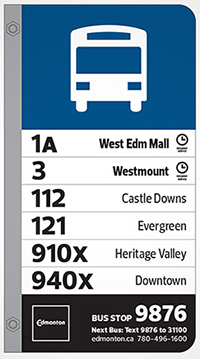
A bus stop is marked by a blue and white sign that lists every bus route servicing a particular stop, and the bus stop number - a unique four or five digit number that identifies the exact stop.

Most ETS buses are equipped with Smart Bus technology, which means they provide real-time information on the location of each bus. While waiting at the stop for your bus, you can use a number of third-party transit tools to look up information on when your bus will arrive. Find out more about what real-time tools suit your needs.

We recommend arriving at your stop approximately 5 minutes before your bus departs. When the bus you want to ride approaches, face the oncoming bus and make eye contact with the operator. That way, the operator knows you want to board.  

Boarding a Bus

When a bus approaches your stop, check the route number and destination name to see if it is the bus you wish to board. You can check this number, on the:

  • Front screen above the windshield (which also includes the bus destination).
  • Small screen located beside the front door (which also includes the bus destination).
  • Back of the bus.

For riders with mobility difficulties, ETS has several travel tools available free of charge to help communicate their trip needs to the operator (customer communication cards, mobility card and bus hailer kit).

If you have a question for the operator, allow others to board first.

Move towards the back of the bus and take a seat if one is available. If not, or if the bus is crowded, you can firmly grip one of the overhead handrails or a support post. Buses may move and stop abruptly, so please hold on tightly.

We appreciate our riders’ continued positive and respective behaviours while riding ETS.  Good etiquette helps make the transit experience pleasant for everyone.

Paying on the Bus

You have multiple fare options to present when you board your bus:

  • Arc card
  • Arc ticket
  • Valid bus transfer
  • Cash (change not provided).

Have your fare ready as you board the bus. Tap your Arc card/ticket on the fare validator, display your transfer or deposit your cash in the fare box as you board.

For riders paying with cash, take a transfer from the operator (even if you don’t need one) to show proof of payment, in the event you are asked by a Transit Peace Officer or a member of Edmonton Police Service.

Exiting the Bus

To let the operator know you’d like to get off the bus, pull the cord above the windows, or press the button on the support post near the front and back doors. A bell will ring, the sign will display “Stop Requested” and a voice will speak to let you know your request has been registered.

The further in advance of your stop you let the operator know you’d like to get off, the more time the operator has to safely stop.

Gather your things, but stay seated until the bus has stopped for your safety.

Take care when stepping off the bus, especially in icy weather.

Understanding Bus Stop Numbers and Signs

Note: All routes used as examples are for demonstration purposes only and are not confirmed route numbers.


Frequent and Crosstown Routes (Single and Double-digits)

Frequent routes are single digit routes that travel on main roads in central areas of the city

These routes come often and are similar to previous routes 1 to 9.

Crosstown routes are double digit routes numbered 51 to 56

They connect transit centres in at least two quadrants of the city, for example West Edmonton Mall Transit Centre and Mill Woods Transit Centre.

Local and Community Routes (Three-digits)

These are routes that operate in one area of the city.

Local and Community routes have three digits.

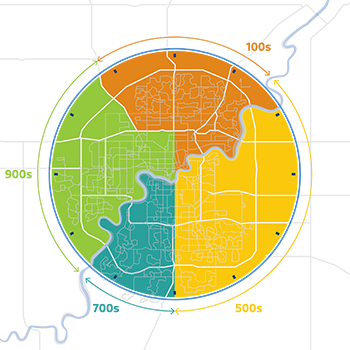
They refer to different quadrants in the city and roughly align with positions on a clockface.

  • 100 series routes operate in north Edmonton
  • 500 series routes operate in southeast Edmonton
  • 700 series routes operate in southwest Edmonton
  • 900 series routes operate in west Edmonton

ETSroutemap


Note: Regional routes in St. Albert use route numbers in the 200s, while Strathcona County Transit buses use route numbers in the 400s. For more information about these routes, as well as service to Leduc, Beaumont, Fort Saskatchewan and Spruce Grove, visit our Regional Service page.

Arc is accepted as a valid form of payment on participating regional transit systems.

Routes Ending with a Letter (X, A and B)

Route numbers that end in a letter provide a special type of service.

Rapid (express) routes: 12 express routes will have an X at the end of their route number.

These routes have fewer stops and carry suburban commuters to downtown destinations and the University of Alberta.

Routes with As and Bs: 3 routes have “A” and “B” branches, which take slightly different paths during part of the trip.

Examples:

  • Route 1 travels between downtown and Capilano, but 1A stays on 106 Avenue until 50 Street while 1B travels on 101 Avenue.
  • Routes 509 and 918 have large loops where route "A" travels clockwise through one part of the neighbourhood and route "B" travels counterclockwise through another part of the neighbourhood. This means reduced walking distance to the bus stop for more people.


Check your schedules and the destination sign on the front of the bus to make sure you’re getting on the right one. If it’s not clear to you, ask the bus operator.

Owl Service

Routes that operate until approximately 3am, 7 days a week.

  • Route 2-OWL — Clareview to West Edmonton Mall
  • Route 4 — Lewis Farms to Capilano
  • Route 8 — University to Abbottsfield
  • Route 9-OWL — Eaux Claires to Century Park
  • Route 511 — Downtown to Mill Woods
School Special Routes

School special routes are numbered in the 600s and only operate during school days.

All ETS customers can ride these buses, but make sure you check the schedules first so you know where it goes. Many schools are also served by regular ETS routes and there are extra trips on some local routes to accommodate a particular school. 

How to read the bus stop signs

Bus Stop Sign

ETS Bus Stop Sign

How to Use Fare Products

Using Arc Cards & Arc Tickets

Using an Arc Card
Tap your Arc card on the validator when entering and exiting buses and LRT platforms to ensure you are charged the correct fare.

Each individual rider (over the age of 12) needs their own form of payment.

  • Add money into your account - you can load as little as $4
  • Register your Arc card online to protect your funds if your card is lost or stolen


Using Arc Tickets and Multi-day Passes
Arc tickets and multi-day passes are valid from the time they are first tapped on the validator.

  • 90-minute, 24-hour, 3-day and 5-day Arc tickets can be purchased at the Arc fare vending machines located in LRT stations and some transit centres
  • Arc tickets must be tapped on a validator when entering and exiting buses or LRT proof of payment areas

How to Use Arc

Using Credit & Debit Cards (Arc Tap to Pay)

Using Arc Tap to Pay

Tap your physical or digital credit or debit card on the validator when entering and exiting buses and LRT platforms to ensure you are charged the correct fare.

Each individual rider (over the age of 12) needs their own form of payment.

  • Riders who use the same payment method each time will continue to benefit from daily and monthly standard adult fare caps.
  • You are not required to set up an account for your digital credit or debit card, unless you use a fare concession, which will require you to update your payment option in your account at myArc.ca. 

How to Tap and Pay
 

Using Cash & Transfers

Exact change is required when paying with cash on ETS buses.

  • Operators do not carry change
  • A transfer will be provided (even if it’s not needed) to show proof of payment
  • Each individual rider (over the age of 12) needs their own form of payment


Transfers can be made between buses and the LRT on a single fare.

  • A transfer allows boarding privileges, including return trips, for a period of 90 minutes
  • The expiry time of the transfer is indicated at the time shown on the transfer where it is torn by the bus operator
  • A valid transfer must be requested from the bus operator when your fare is paid
  • Keep your transfer as proof of payment until you leave the paid area at your destination

Proof of Payment

Riders must always have proof of payment when riding ETS.

  • When boarding a bus or using DATS, Arc cards or tickets must be tapped on fare validators or riders must pay cash when entering
  • If the validator on the bus displays an out of service message, please show your Arc card or ticket to the operator to verify fare payment
  • If a validator at an LRT station displays an out of service message, please tap on or off at another nearby working fare validator

Ride With Us

Popular Fares

table
Fare TypeCost
Arc Card Pay-As-You-Go (90 min within Edmonton)  $3
Cash$3.75
90-minute Arc Ticket$3.75
Physical or Digital Credit or Debit Card$3
24-hour Arc Ticket$10.50
Airport Service    $6

 See all Fares & Passes

Load, tap and go. Arc cards can be used on several regional transit systems.

Tools to plan your trip and view real-time transit information.

ETS offers daily Park & Ride options located around the city.